
目次
初めに
前回の記事でIsaacLabでの強化学習環境の編集手法がわかったので、早速実際に強化学習を行っていきたいと思います!
訓練してみる
train.pyの実行オプションは以下のようになっています。
usage: train.py [-h] [--video] [--video_length VIDEO_LENGTH] [--video_interval VIDEO_INTERVAL] [--num_envs NUM_ENVS] [--task TASK]
                [--agent AGENT] [--seed SEED] [--distributed] [--checkpoint CHECKPOINT] [--max_iterations MAX_ITERATIONS]
                [--export_io_descriptors] [--ml_framework {torch,jax,jax-numpy}] [--algorithm {AMP,PPO,IPPO,MAPPO}]
                [--ray-proc-id RAY_PROC_ID] [--headless] [--livestream {0,1,2}] [--enable_cameras] [--xr] [--device DEVICE]
                [--verbose] [--info] [--experience EXPERIENCE] [--rendering_mode {performance,balanced,quality}]
                [--kit_args KIT_ARGS] [--anim_recording_enabled] [--anim_recording_start_time ANIM_RECORDING_START_TIME]
                [--anim_recording_stop_time ANIM_RECORDING_STOP_TIME]

Train an RL agent with skrl.

options:
  -h, --help            show this help message and exit
  --video               Record videos during training.
  --video_length VIDEO_LENGTH
                        Length of the recorded video (in steps).
  --video_interval VIDEO_INTERVAL
                        Interval between video recordings (in steps).
  --num_envs NUM_ENVS   Number of environments to simulate.
  --task TASK           Name of the task.
  --agent AGENT         Name of the RL agent configuration entry point. Defaults to None, in which case the argument --algorithm is
                        used to determine the default agent configuration entry point.
  --seed SEED           Seed used for the environment
  --distributed         Run training with multiple GPUs or nodes.
  --checkpoint CHECKPOINT
                        Path to model checkpoint to resume training.
  --max_iterations MAX_ITERATIONS
                        RL Policy training iterations.
  --export_io_descriptors
                        Export IO descriptors.
  --ml_framework {torch,jax,jax-numpy}
                        The ML framework used for training the skrl agent.
  --algorithm {AMP,PPO,IPPO,MAPPO}
                        The RL algorithm used for training the skrl agent.
  --ray-proc-id RAY_PROC_ID, -rid RAY_PROC_ID
                        Automatically configured by Ray integration, otherwise None.

app_launcher arguments:
  Arguments for the AppLauncher. For more details, please check the documentation.

  --headless            Force display off at all times.
  --livestream {0,1,2}  Force enable livestreaming. Mapping corresponds to that for the `LIVESTREAM` environment variable.
  --enable_cameras      Enable camera sensors and relevant extension dependencies.
  --xr                  Enable XR mode for VR/AR applications.
  --device DEVICE       The device to run the simulation on. Can be "cpu", "cuda", "cuda:N", where N is the device ID
  --verbose             Enable verbose-level log output from the SimulationApp.
  --info                Enable info-level log output from the SimulationApp.
  --experience EXPERIENCE
                        The experience file to load when launching the SimulationApp. If an empty string is provided, the experience
                        file is determined based on the headless flag. If a relative path is provided, it is resolved relative to the
                        `apps` folder in Isaac Sim and Isaac Lab (in that order).
  --rendering_mode {performance,balanced,quality}
                        Sets the rendering mode. Preset settings files can be found in apps/rendering_modes. Can be "performance",
                        "balanced", or "quality". Individual settings can be overwritten by using the RenderCfg class.
  --kit_args KIT_ARGS   Command line arguments for Omniverse Kit as a string separated by a space delimiter. Example usage:
                        --kit_args "--ext-folder=/path/to/ext1 --ext-folder=/path/to/ext2"
  --anim_recording_enabled
                        Enable recording time-sampled USD animations from IsaacLab PhysX simulations.
  --anim_recording_start_time ANIM_RECORDING_START_TIME
                        Set time that animation recording begins playing. If not set, the recording will start from the beginning.
  --anim_recording_stop_time ANIM_RECORDING_STOP_TIME
                        Set time that animation recording stops playing. If the process is shutdown before the stop time is exceeded,
                        then the animation is not recorded.
公式のdocsに書いてあるやつは未更新の場合が多いので、必ず最初に確認しましょう! とりあえず今回使うのはこの辺りです。慣れてきたら自分の環境に合わせてカスタマイズしてください。
-
headlessIsaacLabのGUIを立ち上げずに学習を行うことができます。これをやらないと同じタスクでも作業時間が爆増するので気をつけてください (↓headlessオプションをつけないとき)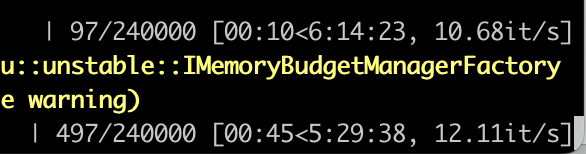 (↓
(↓headlessオプションをつけたとき) (倍以上の差が出てしまっている…)
 -
videoとは言っても、目で見てわかることもたくさんあるので、訓練の様子は監視しておく必要があります。なので、訓練stepが一定量に達するごと短時間のビデオ録画を撮影できるようにしておきます -
max_iterations訓練量を決める変数です。とりあえず10000くらいにしておきます
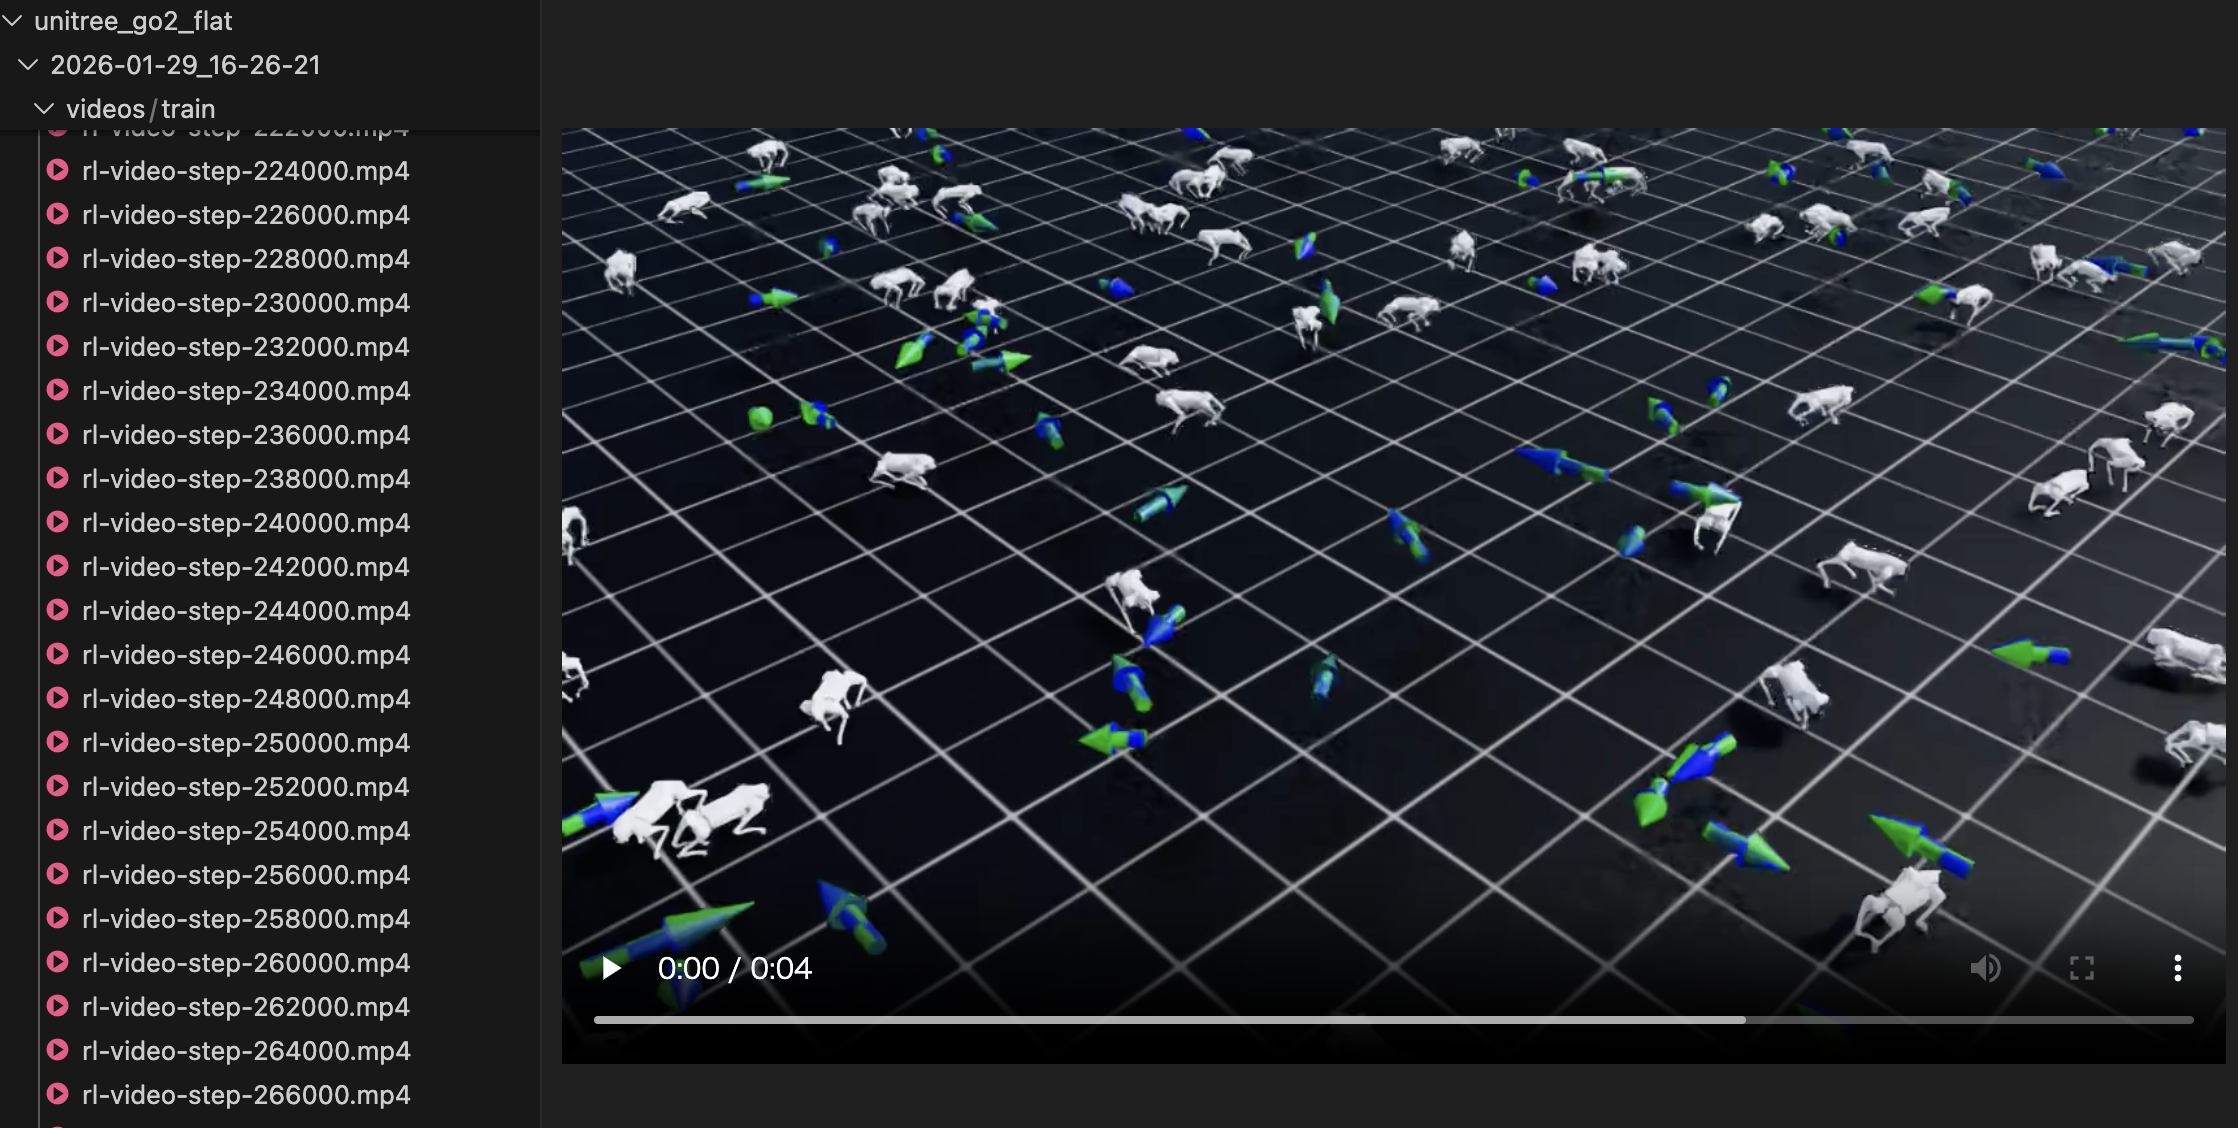 こんな感じでvideoの中身を見ながら学習の進みをチェックできます!
Tensorboardで訓練が進んでいるか確認しよう
ここまでやったら、あとは寝て過ごすだけ…みたいなこともできるのですが、流石にそれだとガチャを回しているだけみたいな感じになってしまうので、設定した報酬やペナルティがきちんと機能しているか、学習が足りているかなどを逐一確認していきましょう。IsaacLabは基本的にPyTorchが裏で動いているので、各種パラメタが収束しているかどうかをTensorboard上で確認することができます。
tensorboard --logdir logs/
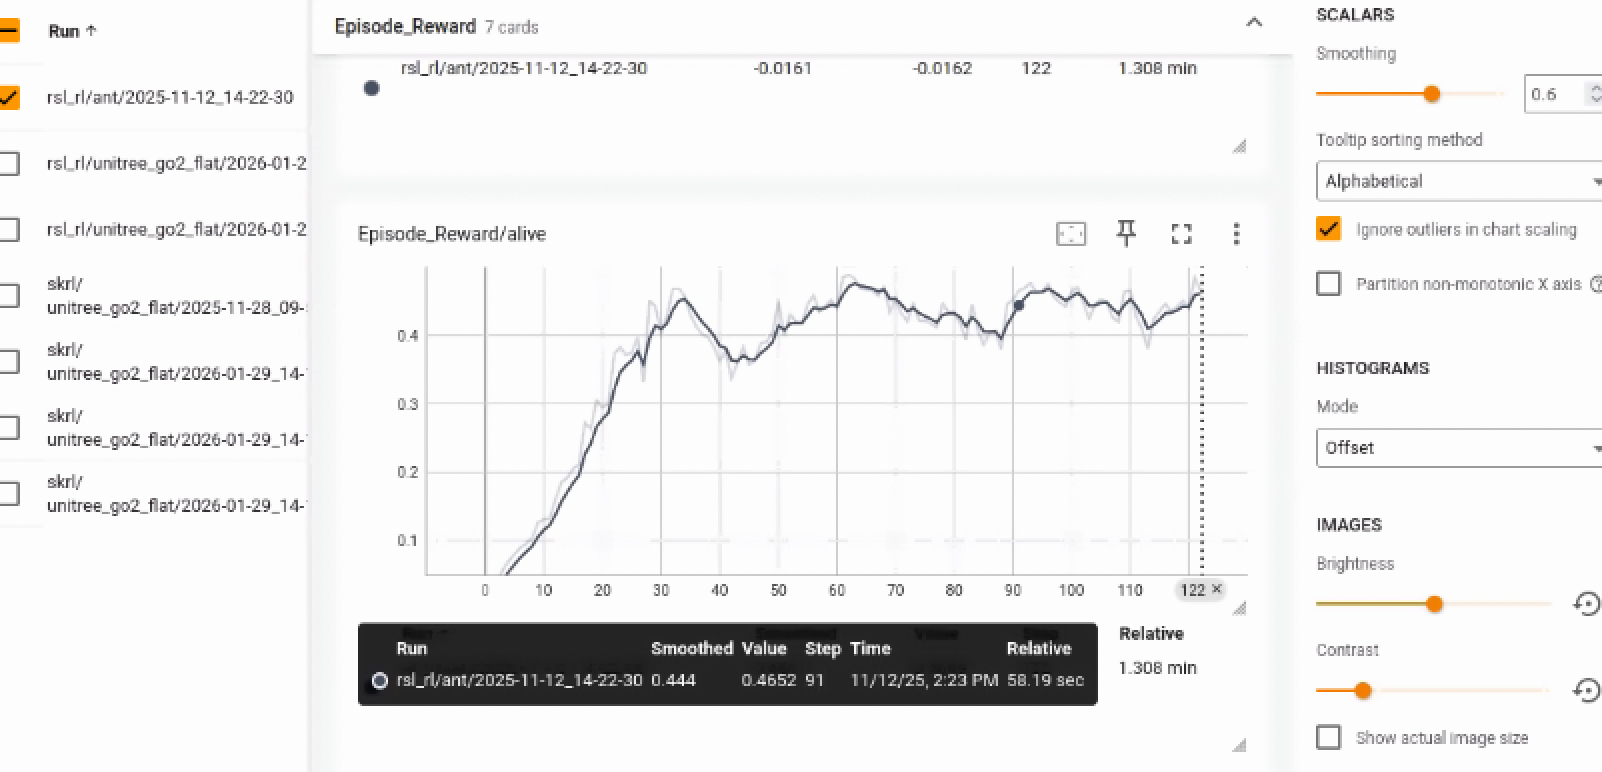
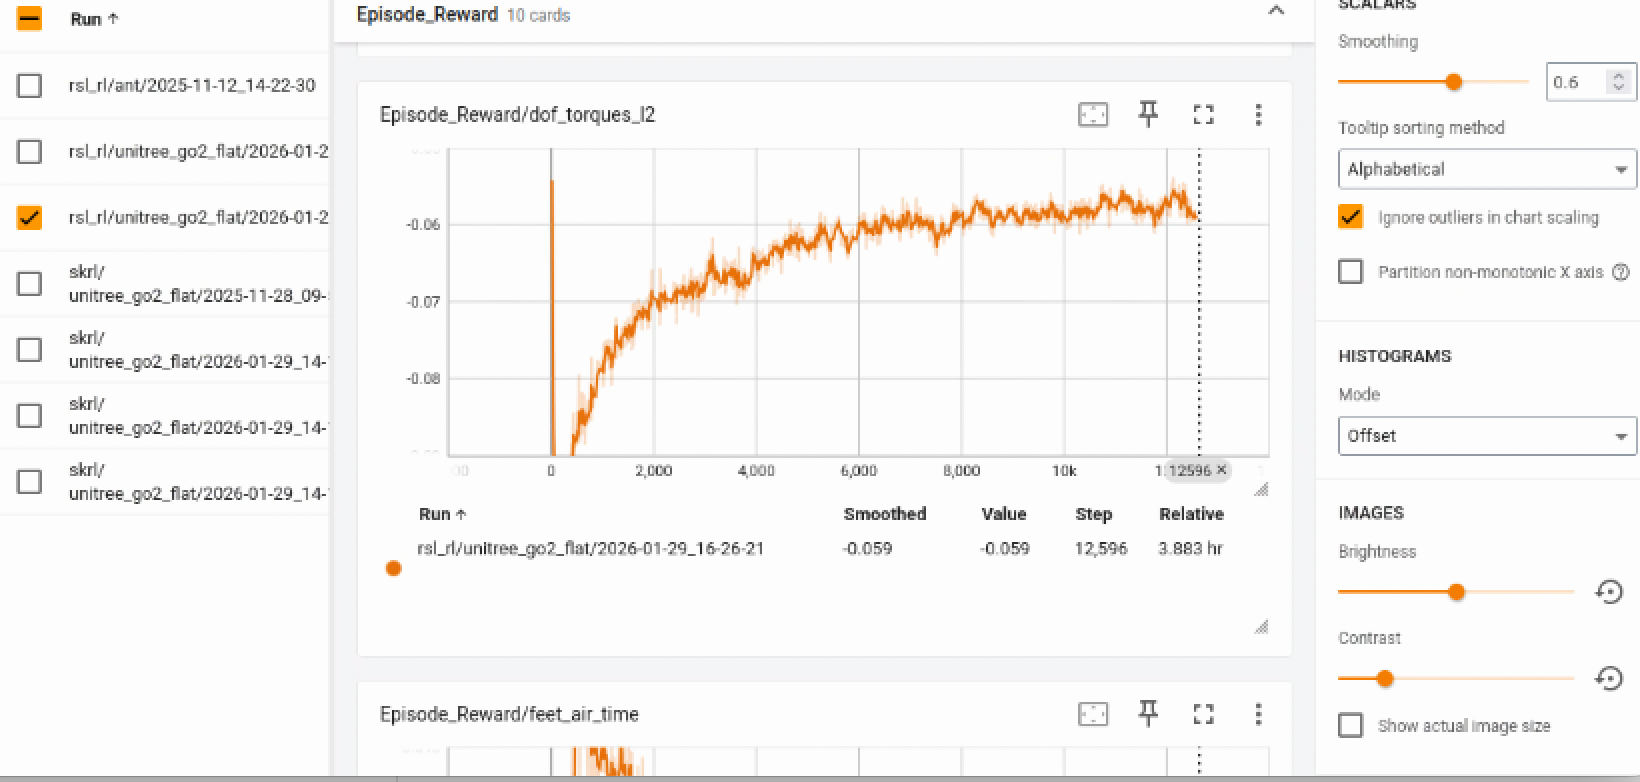
一つ目の画像はあんまり学習が進んでいない時の報酬の動き、二つ目の画像は学習が進んできた時の報酬の動きです。学習が終わってくると、このように報酬の増減が収束してくるので、全ての報酬が二枚目のような推移をしていた場合、それはもうこれ以上学習を進めてもあんまり意味ないかな〜〜ということになります。
再生してみる
今まで説明してきたように、強化学習の中身はNNなので、学習データは*.pythに保存されています。(これ自体のサイズは数百MBくらいなので、たいした重さではないです)
なので、訓練したら、この重みファイルをロードして再生するという流れになります。
usage: play.py [-h] [--video] [--video_length VIDEO_LENGTH] [--disable_fabric] [--num_envs NUM_ENVS] [--task TASK] [--agent AGENT] [--checkpoint CHECKPOINT]
               [--seed SEED] [--use_pretrained_checkpoint] [--ml_framework {torch,jax,jax-numpy}] [--algorithm {AMP,PPO,IPPO,MAPPO}] [--real-time] [--headless]
               [--livestream {0,1,2}] [--enable_cameras] [--xr] [--device DEVICE] [--verbose] [--info] [--experience EXPERIENCE]
               [--rendering_mode {quality,balanced,performance}] [--kit_args KIT_ARGS] [--anim_recording_enabled]
               [--anim_recording_start_time ANIM_RECORDING_START_TIME] [--anim_recording_stop_time ANIM_RECORDING_STOP_TIME]
今回は直接GUIを動かすので、task、checkpointの二つのオプションしか使いません。
checkpointでlogsにある重みファイルを選択し、実行していきます。
python scripts/reinforcement_learning/skrl/play.py --task=Isaac-Velocity-Flat-Unitree-Go1-v0 --checkpoints logs/skrl/unitree_go2_flat/2025-11-28_09-50-27_ppo_torch/checkpoint/best_agent.pt
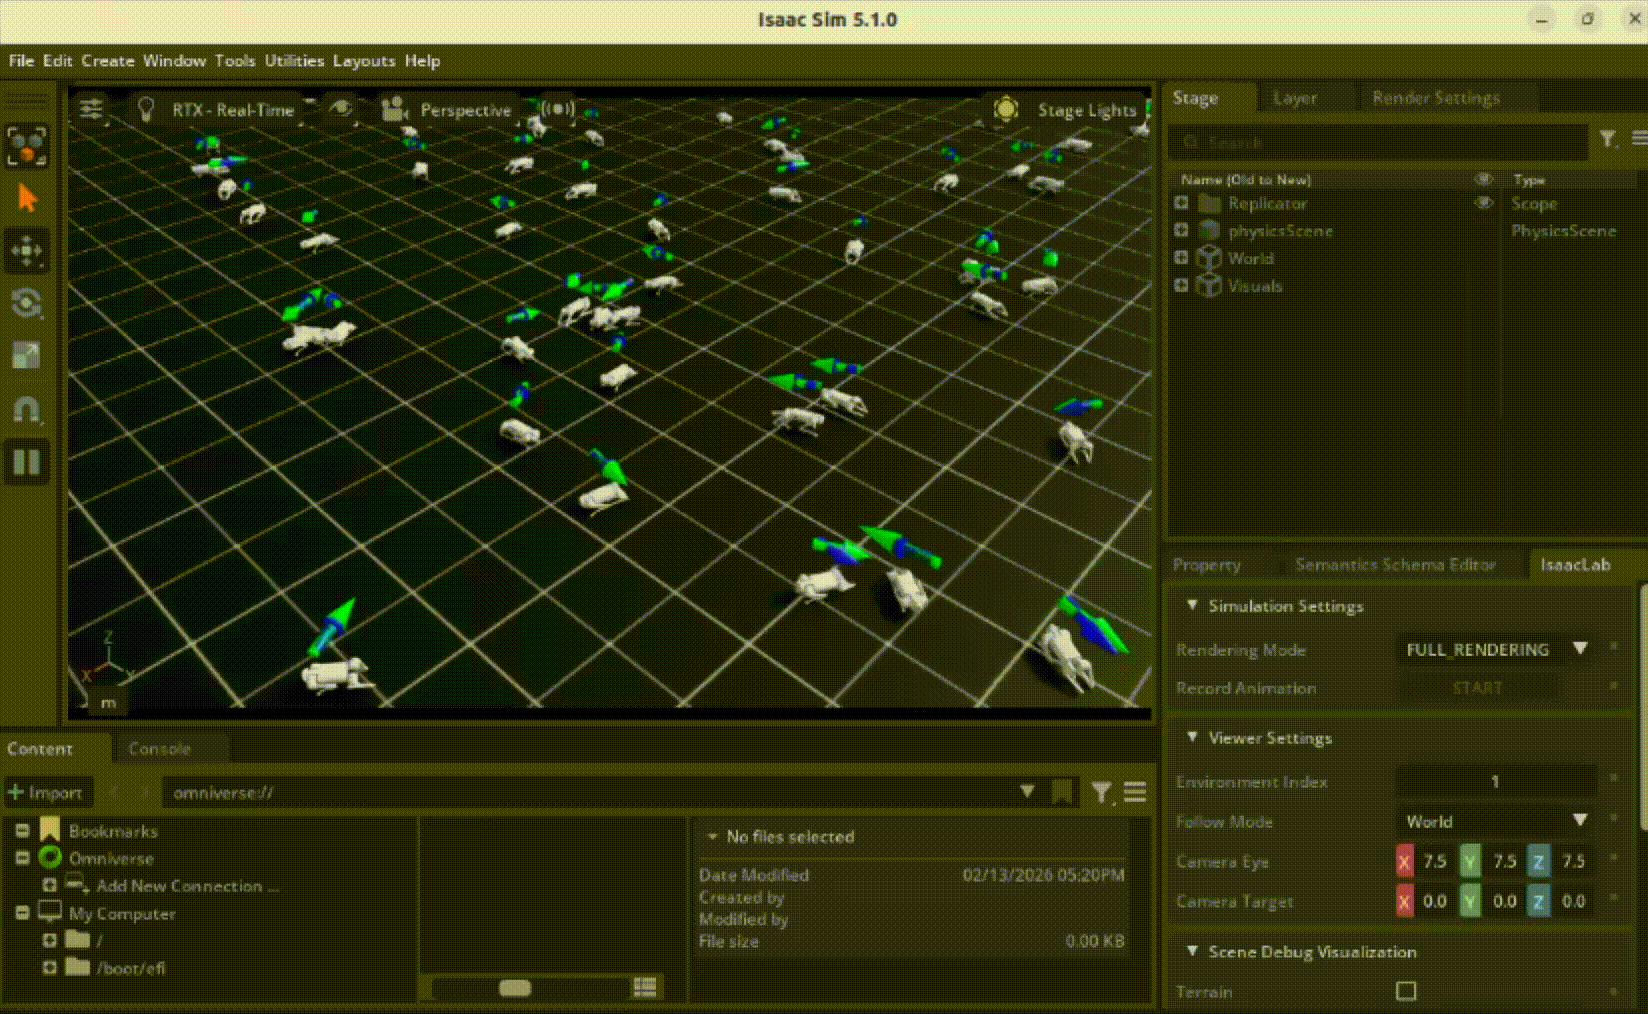
動かすことができました!!
終わりに
今回でIsaacLabの基本的な学習手法を紹介することができたので、次はSim2Sim,Sim2Realなどのより実践的な方法についても記事を残していきたいです。